Challenge 1: Simple circuit #1 (bonus 8%).
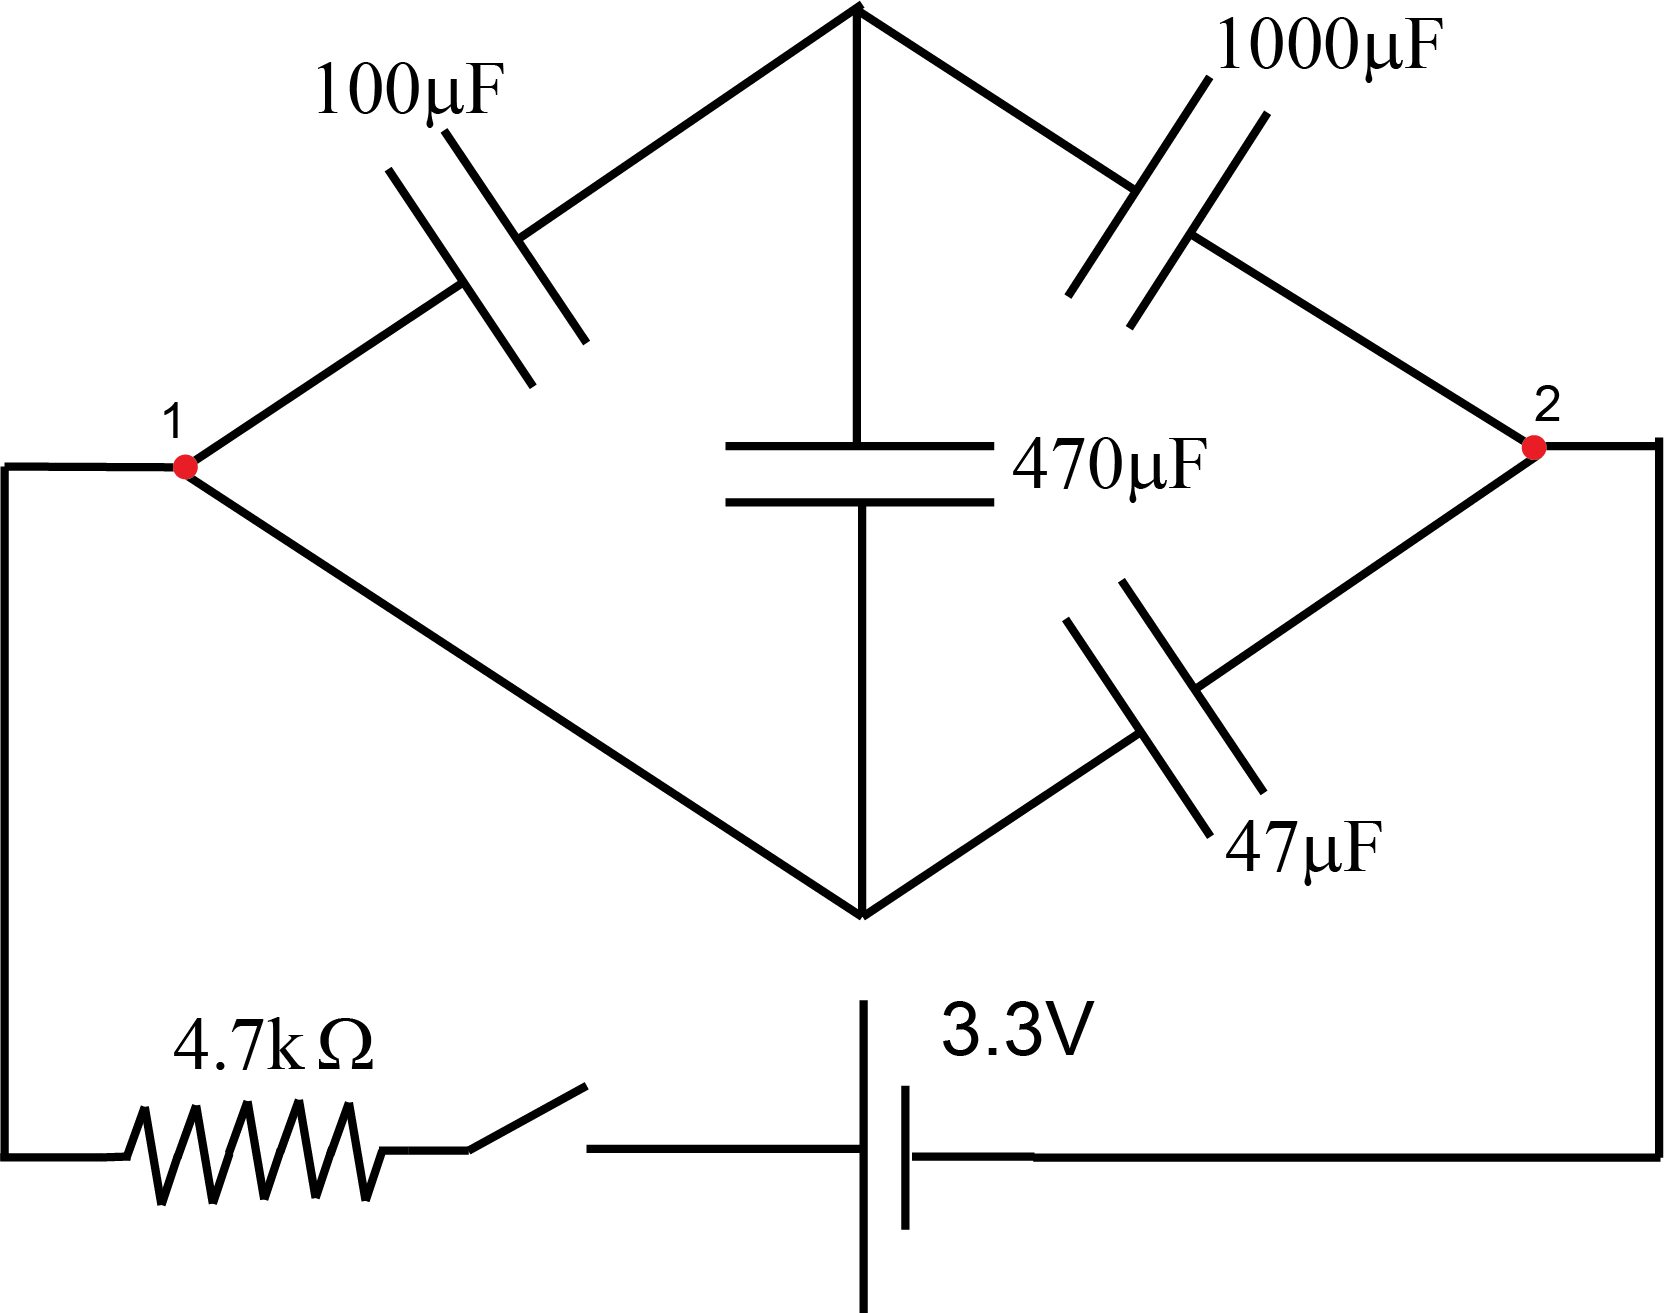
![]() on the combination (integrate the current through the resistor like we did in most experiments). Use the value for the total charge
on the combination (integrate the current through the resistor like we did in most experiments). Use the value for the total charge ![]() and the voltage across the combination (3.3V) to calculate the equivalent capacitance
and the voltage across the combination (3.3V) to calculate the equivalent capacitance ![]() for this combination. Make a snapshot of your breadboard setup for this experiment and include it into report.
for this combination. Make a snapshot of your breadboard setup for this experiment and include it into report.
Draw the circuit diagram and solve the circuit (theoretically calculate equivalent capacitance and voltages across each capacitor using accurate values for capacitances from Experiment 1 and the voltage 3.3V across the combination). Include your solution in the report. Does the theoretical value for ![]() match the one obtained from your measurement?
match the one obtained from your measurement?
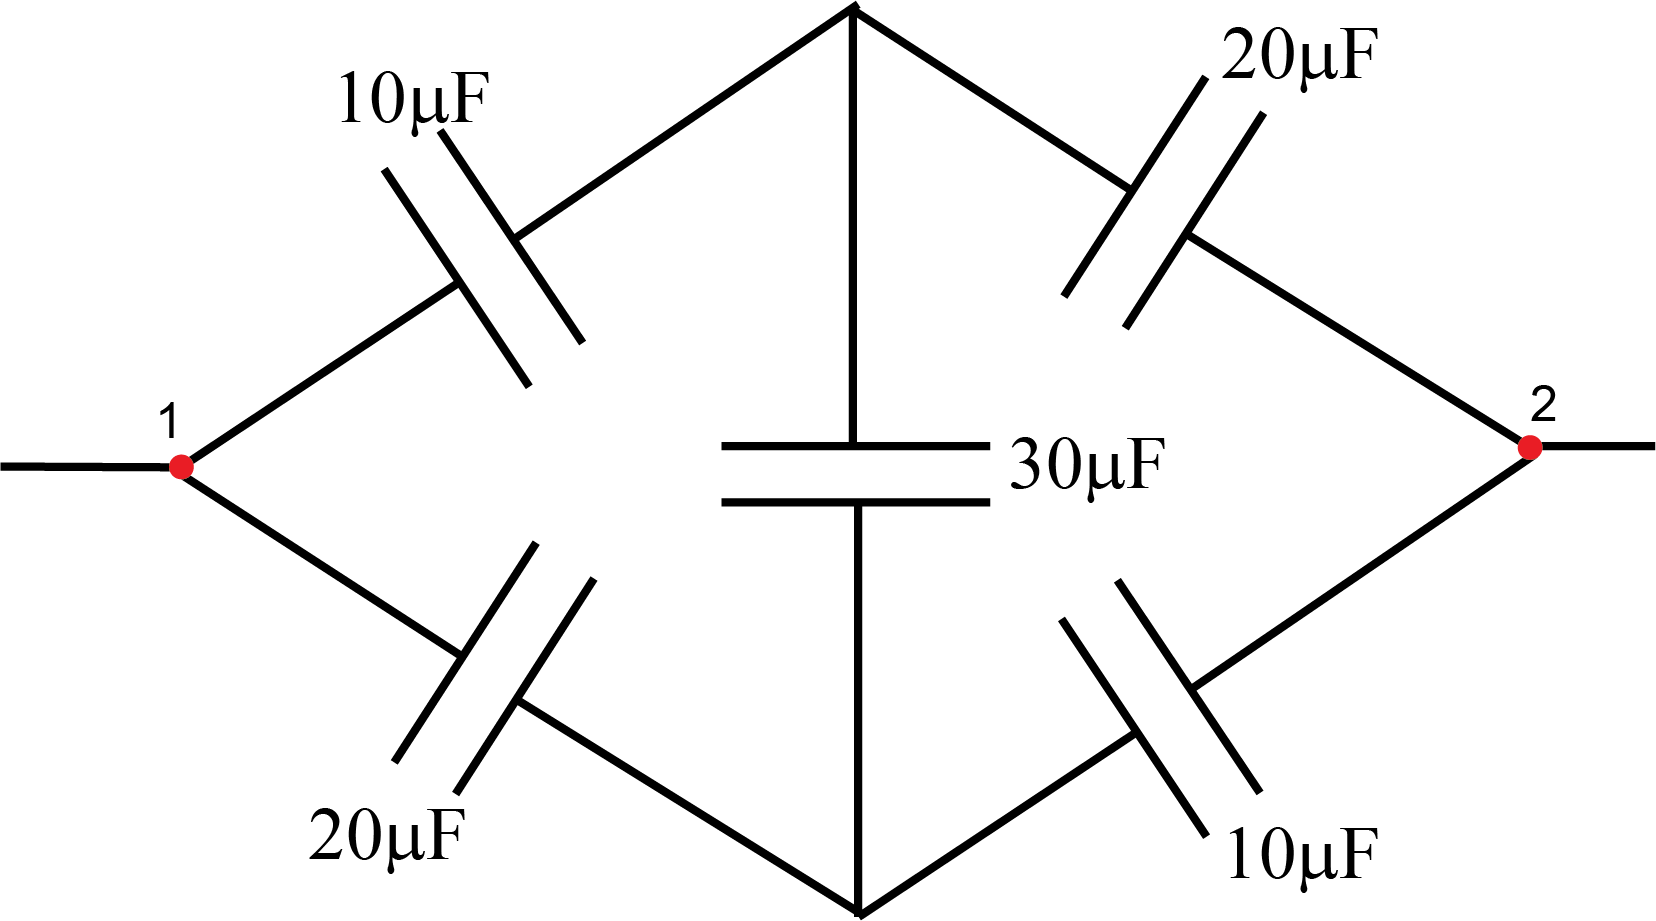
Challenge 2: Simple circuit #2 (bonus 5%).
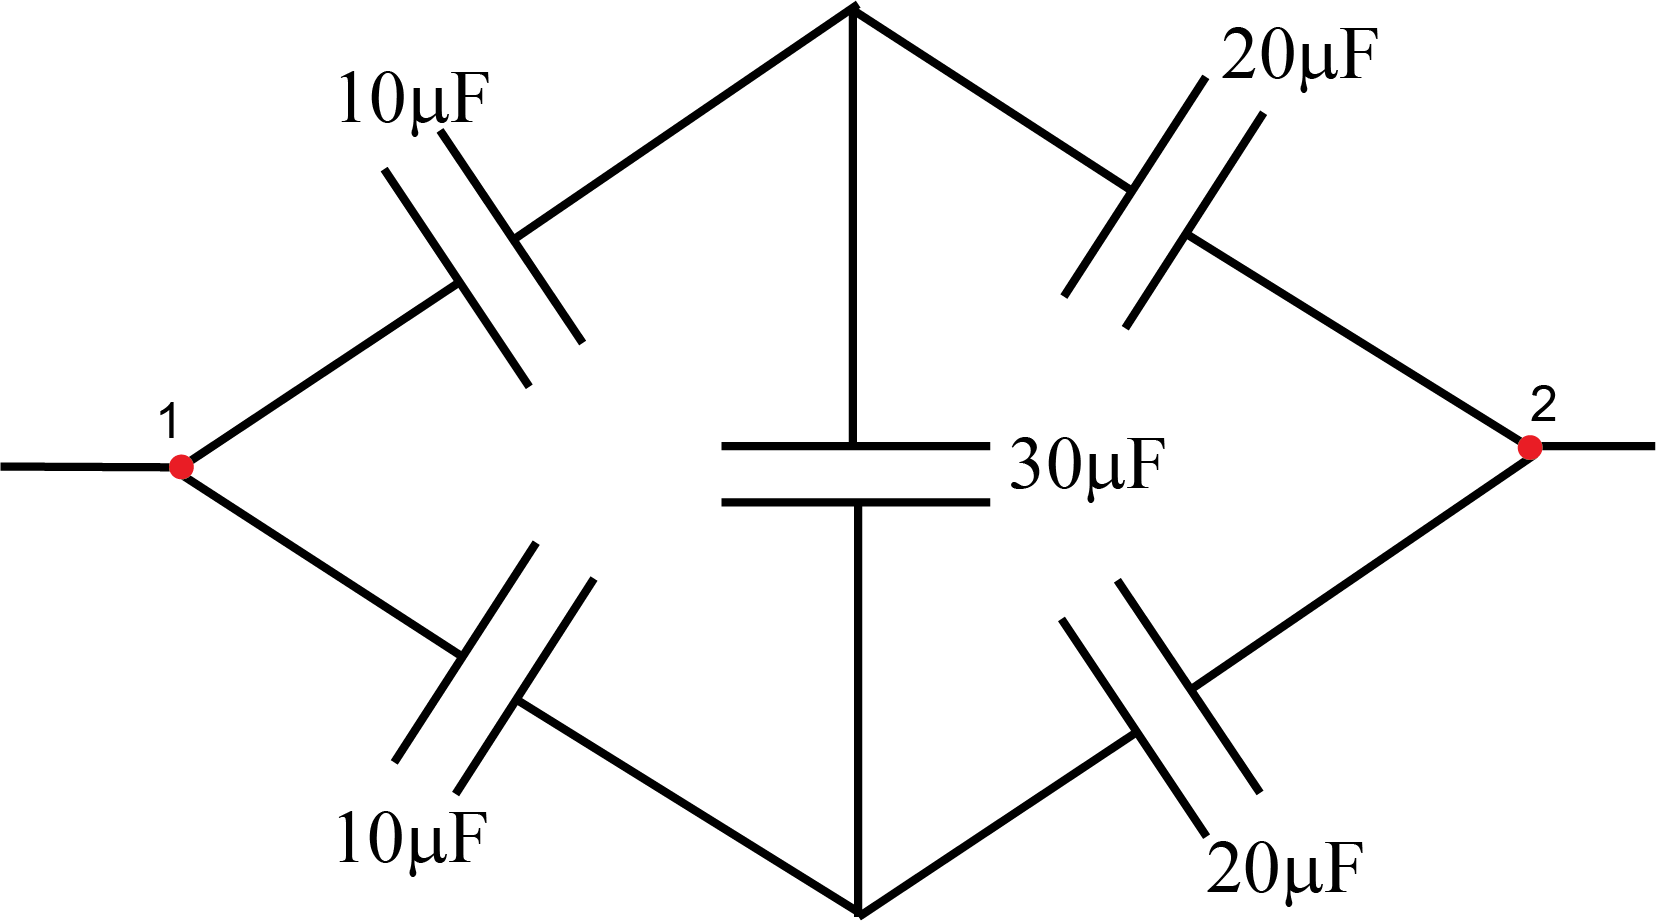
Challenge 3: Intermediate circuit (bonus 10%).